

Six actions cut most winter energy bills, and none of them require a builder. Draught-proofing gaps, lowering your thermostat or boiler flow temperature, fitting proper heating controls, insulating your hot water tank and pipes, keeping radiators clear and maintained, and switching a handful of appliance habits together tackle the bulk of what pushes bills up between October and March.
The Energy Saving Trust estimates that a full set of heating controls, thermostat, programmer, and thermostatic radiator valves, can save a typical semi-detached home around £180 a year. Draught-proofing costs even less and pays back almost immediately, according to BBC reporting on winter savings measures. An Energy Performance Certificate (EPC) gives you a property-specific version of this list, ranked by cost and payback, rather than generic advice.
Here’s what to do in the next 72 hours:
- Seal draughts around letterboxes, keyholes, and skirting boards with cheap draught strips.
- Turn your thermostat down by 1°C and see how the house feels before you touch it again.
- Check your boiler’s flow temperature setting if you have a combi boiler.
- Bleed any radiators that feel cold at the top.
- Close curtains at dusk, not after dark.
- Move furniture away from radiators so heat reaches the room, not the sofa.
Pro Tip: Do a five-minute draught check at every external door and window on a windy day. Hold the back of your hand near the frame; if you feel air moving, that’s heat leaving your home for free.
Key Takeaways
Draught-proofing, heating controls, and boiler flow temperature adjustments deliver the fastest, cheapest winter savings, while an EPC ranks which longer-term upgrade will pay back best for your specific property.
| Point | Details |
|---|---|
| Start with draught-proofing | Seal gaps around doors, letterboxes, and windows first; it’s the cheapest fix with an almost immediate return. |
| Fit a full set of heating controls | A thermostat, programmer, and TRVs together can save around £180 a year for a typical semi-detached home. |
| Lower your boiler flow temperature | Setting a combi boiler to around 60°C helps it run in condensing mode, saving roughly 6 to 8% on heating energy. |
| Track usage with a smart meter | Log readings weekly against a 12-month baseline to see whether changes are genuinely reducing your bill. |
| Use an EPC to prioritise bigger projects | A Completeepc assessment ranks insulation, glazing, and heating upgrades by likely cost and saving for your property. |
Table of Contents
- Why heating dominates your winter energy bill
- Everyday changes that cost nothing and start saving today
- Low-cost winter upgrades that repay quickly
- Heating system upgrades and controls worth investing in
- Cutting electricity use in winter without losing comfort
- How to prioritise: quick wins first, bigger projects second
- Grants, support and where to get help
- Tracking whether your changes are actually working
- Your 30-day winter energy plan
- Myths that waste your money
- Sources
- FAQ
Why heating dominates your winter energy bill
Heating and hot water account for the largest single chunk of a typical UK home’s winter energy spend, which is exactly why the six actions above target that area first. Lighting, cooking, and most other appliances barely move the needle by comparison during the cold months.
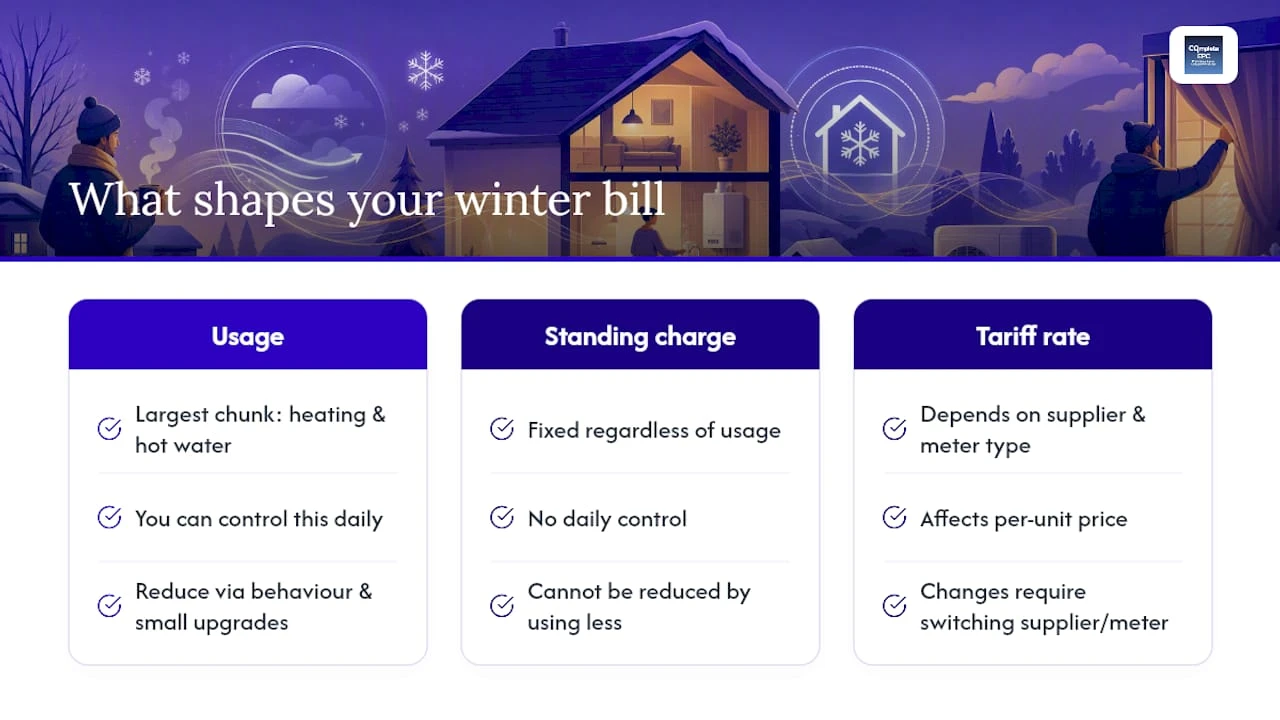
Three things shape what you pay: how much energy you use, the standing charge on your account, and the tariff rate itself. You have real control over the first one. The standing charge is fixed regardless of usage, and tariff choice depends on your supplier and meter type, but usage is the lever you pull every single day without needing to switch anything.
This is where a proper bill breakdown or an EPC earns its keep. Ofgem’s own guidance on saving money on your energy bill points households towards a mix of behaviour change and small upgrades, precisely because most homes are losing heat in the same handful of places: the loft, the windows, the hot water system, and uninsulated pipework. An EPC assessment goes further than a generic checklist. It looks at your specific property, its construction, its current heating system, and its insulation levels, then lists recommendations in order of likely savings and cost. That ranking matters more than any single tip, because the same advice that saves a Victorian terrace hundreds of pounds might save a newly built flat almost nothing, simply because the flat already has cavity wall insulation and double glazing.
Once you know where your property actually loses heat, the low-cost and no-cost changes below become far more targeted than a scattergun approach.
Everyday changes that cost nothing and start saving today
You don’t need to spend a penny to bring your winter bill down. These behavioural shifts work whether you own your home or rent it, and most take effect the same day you make them.
- Turn your thermostat down by 1°C. This is the single cheapest change available to almost every household, and it works cumulatively across the whole heating season.
- Heat the person, not the room. A jumper and thick socks cost nothing to run. Before reaching for the thermostat, try adding a layer first.
- Use timed heating instead of leaving it running. Set your programmer to heat the house before you wake and switch off before bed, rather than letting the boiler cycle all day on a constant setting.
- Only heat rooms you’re using. Close doors to unused rooms and turn radiator valves down (not fully off, more on that later) in spaces you rarely sit in.
- Move furniture and curtains away from radiators. A sofa pushed against a radiator absorbs heat that should be warming the room.
- Close curtains as soon as it gets dark. Thick curtains act as a basic barrier against heat loss through glass, which is one of the biggest weak points in most homes.
- Bleed your radiators in warmer months. A radiator that’s cold at the top but warm at the bottom has trapped air, forcing your boiler to work harder for the same result. The Energy Saving Trust recommends doing this when radiators are cool, ideally in summer, to avoid any risk of scalding.
- Check your hot water thermostat. Many cylinders are set higher than needed. Around 60°C is usually sufficient for domestic use without wasting energy on excess heat.
If you rent, most of this list needs no landlord permission at all. Draught strips, curtain changes, radiator reflectors, and thermostat adjustments on existing controls are all things you can do the day you move in. Where you need to be careful is anything that alters fixed heating equipment, like changing a boiler’s flow temperature or fitting new thermostatic radiator valves (TRVs), since some tenancy agreements ask you to check first.
There’s a safety line here that matters more than any saving. Turning heating down too far isn’t a good idea for households with babies, elderly residents, or anyone with a chronic health condition. The UK Health Security Agency and NHS guidance generally point to around 18°C as a reasonable minimum for main living areas where vulnerable people spend most of their time, and that figure shouldn’t be sacrificed purely to hit a savings target. Comfort and safety come before the last pound of savings, every time.
Low-cost winter upgrades that repay quickly
Once the free changes are in place, a small budget, often under £50 per item, unlocks the next tier of savings. These measures typically pay for themselves within a single winter, sometimes within weeks.
- Radiator reflector panels sit behind radiators on external walls and bounce heat back into the room instead of letting it escape into brickwork. The Energy Saving Trust’s DIY projects guide lists these among the cheapest fixes with a measurable annual saving.
- Hot water tank jackets wrap around an uninsulated cylinder and cut heat loss between uses, meaning your water stays hotter for longer on the same energy input.
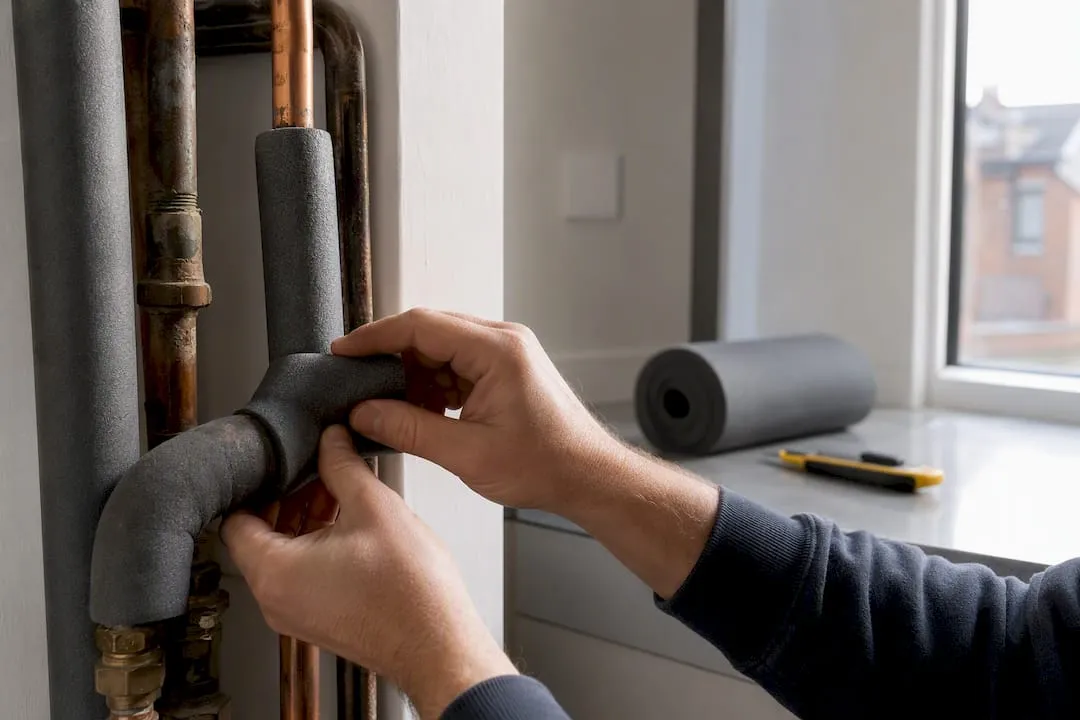
- Pipe insulation for exposed hot water pipes in lofts, cupboards, or under floors stops heat bleeding away before it even reaches the tap or radiator.
- Draught excluders for doors and foam strips around window frames close the small gaps that let cold air stream in continuously.
- LED bulbs replacing older halogen or incandescent bulbs cut lighting costs and last considerably longer, reducing both energy use and replacement frequency.
- A simple letterbox brush and keyhole cover block two of the most commonly overlooked draught points in older front doors.
Pro Tip: Do a DIY audit before you spend anything. Walk your home room by room on a cold evening, feel for draughts at every door, window, and floorboard gap, and check your loft hatch for insulation. This tells you exactly which cheap fix to buy first, rather than guessing.
Renters can install almost everything on this list without altering the property permanently. Reflector panels, draught strips, and pipe lagging are all removable. Tank jackets are usually fine too, though it’s worth a quick check with your landlord if the cylinder is shared or part of a communal system. Anything that involves drilling into walls or altering fixed pipework is the point where you should ask first.
Heating system upgrades and controls worth investing in
Beyond the low-cost fixes sits a tier of investment that changes how efficiently your whole heating system runs, not just how much heat escapes.
A complete set of heating controls, a room thermostat, a timer or programmer, and thermostatic radiator valves on individual radiators, lets you heat different rooms to different temperatures at different times of day; for practical guidance on smart thermostats and scheduling, see these smart climate control tips for UAE homes. That precision is where the Energy Saving Trust’s £180-a-year estimate for a typical semi-detached home comes from. Without TRVs, every radiator in the house runs at the same setting regardless of whether the room is occupied, which wastes heat in spare bedrooms and rooms nobody’s sitting in that afternoon.
If your home has a combi boiler, flow temperature is worth checking. Many boilers leave the factory set higher than they need to be, often around 70 to 80°C, which stops the boiler running in its efficient condensing mode. Lowering the flow temperature to around 60°C can help the boiler condense more often, and research from the Centre for Sustainable Energy suggests this can bring typical savings in the region of 6 to 8% on heating energy. It’s a free adjustment on most modern boilers, made through the control panel, though checking your boiler’s manual first avoids setting it too low for comfortable hot water.
Think of upgrades in three rough tiers when deciding where to spend:
- Low impact, low cost: improving existing thermostat scheduling, adjusting flow temperature, fitting TRVs on radiators that don’t have them.
- Medium impact, medium cost: a smart thermostat with scheduling and geofencing, professional radiator balancing, loft insulation top-ups.
- High impact, higher cost: cavity wall insulation, secondary or replacement glazing, a boiler upgrade or replacement heating system.
The CSE also flags loft insulation and secondary glazing as effective medium and longer-term measures, since a poorly insulated loft accounts for a significant share of a typical home’s fabric heat loss. Before committing to anything in the high-impact tier, get a qualified engineer to check the boiler and heating system, or book an EPC assessment to see whether the investment actually matches your property’s specific weak points rather than a generic recommendation.
Cutting electricity use in winter without losing comfort
Heating dominates the bill, but electricity habits still add up, particularly with more time spent indoors and laundry drying inside during colder months.
A few rules cover most of the ground. Wash clothes at 30°C to 40°C rather than higher temperatures; modern detergents are built for lower-temperature washes and the energy difference over a winter’s worth of laundry is real. Fill the machine before running a cycle rather than doing frequent half-loads, and use the eco setting where your machine has one, since it typically runs longer but at lower power draw. When boiling a kettle, measure the water you actually need rather than filling it to the top every time.
Switching remaining halogen or incandescent bulbs to LEDs is one of the simplest wins left in most homes, and the saving compounds every time that light gets used through the darker winter evenings.
Drying laundry indoors is where winter creates a genuine choice. Running a tumble dryer is one of the more expensive things a household does electrically, and a dehumidifier paired with a clothes airer in a closed room is often the cheaper alternative, while also helping prevent the damp and condensation that indoor drying can cause. The key safety point is ventilation: once the clothes are dry, open a window or door to let the room air out properly before it’s used again, rather than sealing moisture into a space that never gets a chance to breathe.
How to prioritise: quick wins first, bigger projects second
Not every household should tackle these measures in the same order, and cost isn’t the only factor that matters. Budget, whether you rent or own, and how long you plan to stay in the property all shape the right sequence.
A simple way to sort your options:
- Quick, cheap wins (do this week): draught-proofing, thermostat adjustment, curtain habits, radiator reflectors, bleeding radiators.
- Medium-cost controls (do this month): TRVs, a programmer or smart thermostat, tank and pipe insulation, checking boiler flow temperature.
- Longer-term projects (plan over the year): loft insulation, cavity wall insulation, glazing improvements, boiler replacement.
The decision rule for moving between tiers is straightforward: exhaust the free and cheap options first, because they’re low risk and pay back within weeks, then use what you learn from doing your own draught audit to decide whether a medium-cost control genuinely fits your home. Only move into the longer-term tier once you have evidence, not guesswork, about where your property actually loses heat.
This is exactly the gap an EPC or a short professional assessment closes. A government-standard EPC lists specific recommendations with estimated costs and likely savings attached to each one, so instead of choosing between loft insulation and new glazing based on a generic ranking, you’re choosing based on what your specific property will actually benefit from most.
Pro Tip: Before spending on any medium or long-term measure, check whether you’re eligible for a grant or scheme first. Some upgrades that look expensive upfront become far more affordable once subsidised support is factored in, and applying after you’ve already paid full price means missing out entirely.
Grants, support and where to get help
Support schemes exist for households who need help beyond DIY fixes, though eligibility and availability vary by area and change over time, so always check current rules before assuming you qualify.
- The Warm Home Discount scheme offers a one-off reduction on electricity bills for eligible households, typically those on lower incomes or receiving certain benefits.
- Winter Fuel Payment support helps eligible pensioners with heating costs during the colder months.
- Supplier-run schemes and the Energy Company Obligation (ECO) can fund insulation or heating upgrades for qualifying homes.
- Local authorities often run their own grant or advice schemes worth checking alongside national ones.
If you’re struggling to pay, contact your supplier first, they have obligations to offer support and payment plans, then your local authority or Citizens Advice if you need further help. One safety reminder worth repeating: never block trickle vents, air bricks, or other required ventilation while draught-proofing, since some ventilation exists specifically to prevent damp and condensation buildup.
Tracking whether your changes are actually working
Knowing your baseline is the only way to tell if any of this is paying off, so start measuring before you make changes, not after.
- Pull your last winter’s bills or a 12-month usage summary from your supplier to establish what normal looks like for your home.
- Check your smart meter or in-home display weekly, since these tools show near real-time consumption and make it obvious when a change has had an effect, according to Ofgem’s guidance.
- Log your readings against the weather, because a colder week will always use more energy regardless of what you’ve changed, so compare like for like where possible rather than panicking over one unusually cold spell.
Behavioural changes show up almost immediately, often within the same billing cycle. Draught-proofing and small DIY upgrades typically take a few weeks to reflect fully in your bill. Bigger structural work, like insulation or a heating system change, usually takes a full heating season before the true annual saving becomes clear.
Your 30-day winter energy plan
Spreading these actions across a month makes the whole list manageable rather than overwhelming to tackle all at once.
- Days 1 to 7 (low cost, do now): sign up for a smart meter or energy monitoring app if you don’t already have one, do your draught audit, seal obvious gaps, adjust your thermostat, and start closing curtains at dusk. Renters can complete this entire week without landlord involvement.
- Days 8 to 21 (low to medium cost): fit radiator reflectors and a hot water tank jacket, bleed radiators if needed, check your boiler’s flow temperature, and install any missing TRVs. Homeowners can make all these changes directly; renters should confirm tank jacket and TRV changes with their landlord first.
- Days 22 to 30 and beyond (medium to high cost): book an EPC or professional assessment to identify the best longer-term project for your specific property, check grant eligibility for insulation or heating upgrades, and schedule any qualified engineer work needed for boiler settings.
By day 30, you should have a clear before-and-after comparison from your smart meter readings and a ranked list of what to tackle next.
Myths that waste your money
Some widely repeated advice actually works against you. Leaving heating on low all day “because it’s cheaper than turning it on and off” isn’t generally true for most modern, well-controlled homes; a timed schedule that heats when needed usually costs less. Turning radiators off completely in unused rooms can also cause problems, since cold, unheated rooms next to heated ones risk condensation and damp, so a low setting rather than fully off is the safer approach. Never attempt to adjust boiler pressure or gas settings yourself if you’re unsure. Complex heating changes and major insulation work are jobs for a qualified engineer or assessor, not a weekend DIY project.
What years assessing homes teaches you about winter savings
The properties that struggle most in winter rarely have one dramatic fault. It’s usually three or four small, unglamorous issues stacked together, an unlagged pipe here, a draughty letterbox there, a boiler running hotter than it needs to. Tenants often assume they can’t touch anything without permission, when most of the cheapest fixes need none at all. Landlords, meanwhile, frequently underestimate how much a £15 tank jacket or a set of TRVs can shift a property’s running costs, focusing instead on bigger, pricier work that isn’t always the most cost-effective first move.
A tailored next step once you’ve covered the basics
DIY measures genuinely work, and most households will see a real difference just from the changes covered above. Once you’ve done the free and low-cost fixes, the question becomes which medium or long-term project actually suits your property, and that’s where a proper energy performance assessment earns its cost back. A Completeepc assessment gives you a ranked, property-specific list of recommendations, with estimated costs and likely savings against each one, so you’re not guessing between loft insulation and new glazing based on generic advice. It also flags whether you might be eligible for grant support before you commit to spending anything.
If you want that clarity, you can book an EPC check from £34.95 and get a report tailored to your actual home, not a one-size-fits-all checklist.
Sources
Check the Energy Saving Trust for DIY project costings, Ofgem for consumer bill advice, and the Centre for Sustainable Energy for insulation and boiler guidance. For a property-specific plan, visit Completeepc.
This article is general information, not a substitute for advice from a qualified financial advisor. Consult a qualified financial professional about your own circumstances before acting on anything here.
- Practical tips to save on energy bills this winter
- Quick tips and home improvements to help you heat your home for less
- Save money on your energy bill
- Energy saving tips for winter – Centre for Sustainable Energy
- Improve your home’s energy efficiency
FAQ
What is the 4pm rule on heating?
There’s no official “4pm rule” from a national body; it’s shorthand some households use for switching heating on later in the afternoon rather than running it all day, which lines up with the timed-heating approach covered above.
What is the simplest way to cut an electric bill?
Switching to LED bulbs, washing laundry at 30 to 40°C, and avoiding standby power on unused devices are among the simplest changes, alongside using a dehumidifier and airer instead of a tumble dryer for indoor drying.
What runs up an electric bill the most in winter?
Heating and hot water dominate winter energy costs in most homes, followed by appliances used more heavily indoors, such as tumble dryers and electric heaters used to top up central heating.
Does turning the thermostat down really save money?
Yes. Turning your thermostat down by 1°C is one of the cheapest, most immediate changes available, and it works alongside heating controls like TRVs that let you heat only the rooms you’re using.
Is it worth getting an EPC just for energy-saving advice?
An EPC gives property-specific, ranked recommendations with estimated costs and savings, which is more useful for prioritising bigger projects than generic tips, and a Completeepc assessment can show you exactly where your home loses the most heat.